
The smell of freshly baked Swiss pastry can make any morning special. I remember watching my grandmother make her Swiss croissant recipe. Her hands moved with care and love. This sparked my desire to make the perfect gipfeli recipe, a Swiss pastry that brings warmth and comfort.
Imagine making a flaky, buttery treat that feels like a trip to the Swiss Alps. This gipfeli recipe will teach you how to make a traditional Swiss pastry. You’ll learn to create the three layers that make it so special.
Key Takeaways
- Master the authentic Swiss pastry technique
- Create perfectly flaky gipfeli layers at home
- Understand the unique difference between gipfeli and French croissants
- Learn professional baking techniques for home cooks
- Discover the cultural significance of Swiss baking
Table of Contents
What is a Traditional Swiss Gipfeli

The Gipfeli is a standout in Swiss cuisine. It’s more than a breakfast treat; it’s a symbol of Swiss culture. This pastry is deeply rooted in the country’s heritage.
Origins of Swiss Pastry Making
The Gipfeli’s story starts in Switzerland’s rich baking traditions. Gipfeli means “small summit” in Swiss German. Its crescent shape looks like mountain peaks. It combines Austrian and French baking styles, making it a Swiss specialty.
- Originated in Swiss alpine regions
- Developed from European baking techniques
- Perfected over generations of bakers
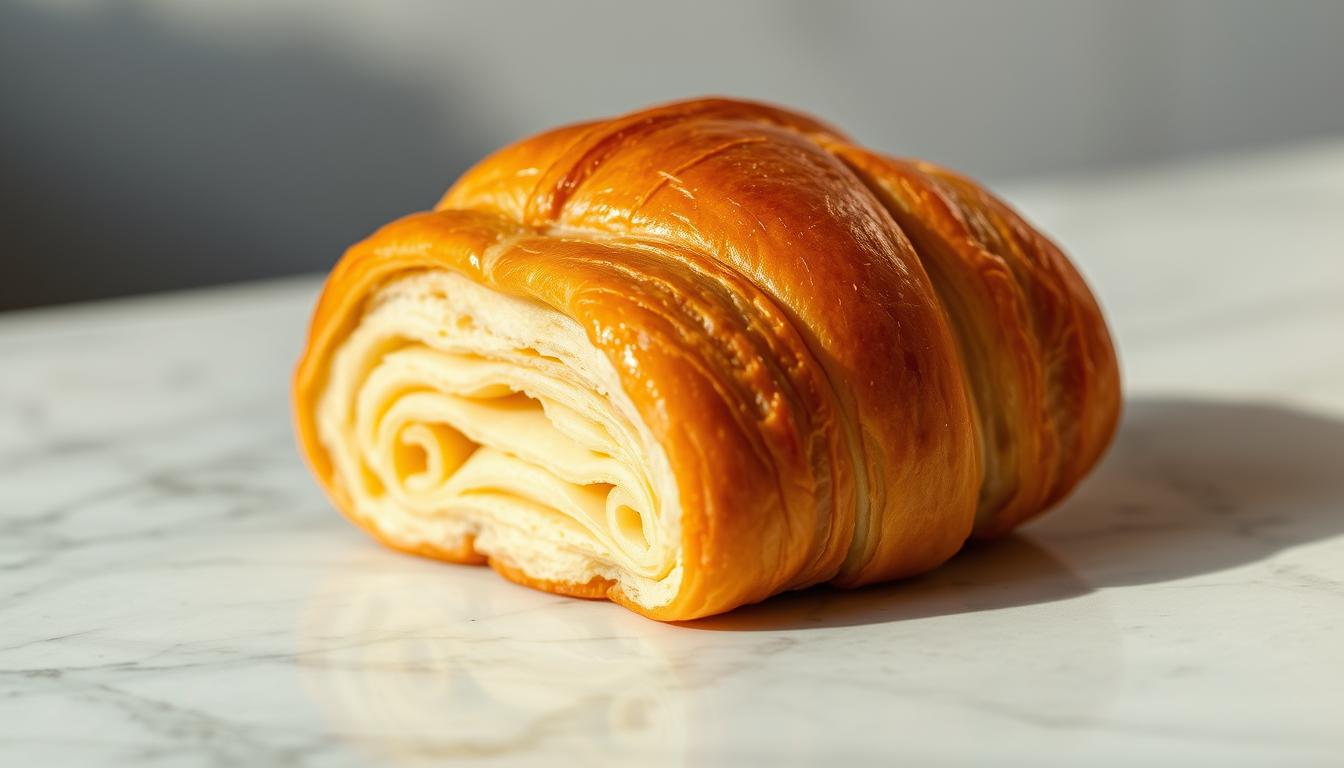
Difference Between Gipfeli and French Croissants
Gipfeli and French croissants may look alike, but they’re different. Swiss Gipfeli are smaller and have a denser texture. They also have a richer buttery taste. Swiss baking methods make Gipfeli unique compared to French croissants.
Cultural Significance in Switzerland
In Switzerland, Gipfeli are a daily tradition. They’re enjoyed with coffee or as a quick snack. These pastries showcase Swiss culinary skill and dedication to detail.
“A Gipfeli is not just food, it’s a piece of Swiss tradition you can taste.” – Swiss Bakery Master
Essential Ingredients for Perfect Layers

Making tasty breakfast pastries begins with picking the right ingredients. The success of your Gipfeli depends on knowing how each part works together. This creates those flaky, buttery layers we all love.
The main ingredients for real Gipfeli are:
- High-quality all-purpose flour (3 cups)
- Warm milk (1 cup)
- Granulated sugar (2 tablespoons)
- Fine salt (1 teaspoon)
- Instant yeast (2 teaspoons)
- Cold unsalted butter (½ cup)
- Beaten egg (1)
Butter is crucial for those flaky, buttery layers. Use European-style butter with more fat for the best taste. Make sure your flour is fresh and sifted for smooth dough.
Pro tip: Cold butter is key to creating those signature flaky layers in your breakfast pastries!
If you follow a special diet, you can try different options. Use gluten-free flour for the base and plant-based butter instead of dairy. Remember, these changes might affect the texture, so you might need to adjust your method.
Kitchen Tools and Equipment Needed

Making delicious gipfeli at home is easy with the right tools. You don’t need a fancy kitchen to enjoy Swiss pastries. Just a few basic tools and a love for baking can make a big difference.
To start baking Swiss pastries, you’ll need some key equipment. It doesn’t matter if you’re new to baking or have lots of experience. The right tools can help your gipfeli turn out amazing.
Basic Tools for Beginners
- Rolling pin (wooden or marble)
- Pastry brush
- Baking sheet
- Parchment paper
- Sharp knife or pastry cutter
Professional Baker’s Equipment Options
| Equipment | Purpose | Skill Level |
|---|---|---|
| Stand Mixer | Efficient dough kneading | Intermediate to Advanced |
| Dough Scraper | Precise cutting and handling | All Levels |
| Digital Kitchen Scale | Accurate ingredient measurement | Advanced |
Optional Specialty Items
If you want to get really good at baking, think about getting special tools. A French-style butter pat or a lamination mat can help you make gipfeli with flaky layers. These tools are perfect for those who love Swiss bakery pastries.
But remember, the most important things are your skills and passion. Start with the basics and add more tools as you get better.
Preparing the Dough Base
Making the perfect dough base is key for a great gipfeli recipe. Start by picking top-notch ingredients. Also, learn how to mix them just right.
First, get your main ingredients for this Swiss pastry:
- 3 cups all-purpose flour
- 2 teaspoons instant yeast
- 2 tablespoons sugar
- 1 teaspoon salt
- 1 cup whole milk (warmed to 110°F)
Temperature is important when making gipfeli. Warm milk wakes up the yeast. This makes the pastry soft and rich.
Mixing dry ingredients first is a good idea. This makes a smooth flour mix. Then, add the warm milk.
Kneading is a special skill in Swiss pastry making. You need to knead the dough for 8-10 minutes until it’s smooth and elastic. This helps create the flaky layers.
“The secret to perfect gipfeli lies in patience and precision during dough preparation.” – Swiss Baking Tradition
Look for these signs of well-prepared dough:
- Smooth, uniform texture
- Slight resistance when stretched
- Springs back when gently pressed
Don’t get discouraged if it’s not perfect the first time. Making gipfeli is a skill that takes practice. Each try brings you closer to making authentic Swiss pastry.
Gipfeli Recipe: The Classic Method
Making the perfect swiss croissant takes patience and precision. It’s all about mastering the art of making buttery pastries. This classic method will help you create authentic Gipfeli that will take you straight to Switzerland.
Creating the Basic Dough
Your Gipfeli journey starts with quality ingredients and careful prep. First, gather these key items:
- Bread flour (high-protein content)
- Cold unsalted butter
- Active dry yeast
- Sugar
- Salt
- Milk
Butter Layer Technique
The secret to amazing swiss croissants is the butter layer. Take ½ cup of cold unsalted butter and flatten it between parchment paper into a thin rectangle. This step is crucial for creating those delicate layers in your buttery pastries.
Folding and Lamination Steps
Lamination turns your dough into a layered masterpiece. Here’s how to do it:
- Roll your dough into a larger rectangle
- Place the butter in the center
- Fold the dough over the butter like a letter
- Roll out gently
- Fold and repeat 3-4 times
Pro tip: Keep your butter and dough cold throughout to get the flakiest results!
Mastering the Three-Layer Technique
Getting good at the three-layer technique is key in Swiss baking, like making Gipfeli. The flakiness of your pastry depends on how well you handle the dough during lamination.
In Swiss baking, controlling temperature is very important. Make sure your butter is cold and firm. This keeps the butter separate from the dough, creating distinct layers.
- Chill butter between 50-55°F for optimal lamination
- Use a marble surface or refrigerated countertop when possible
- Work quickly to prevent butter from warming
Professional bakers say patience and precision are essential for flaky layers. Each fold adds more layers, turning simple ingredients into a delicate pastry.
“The secret to perfect Gipfeli is in the technique, not just the ingredients” – Swiss Baking Masterclass
It takes practice to master this Swiss baking method. Don’t worry if your first tries aren’t perfect. With each fold and roll, you get better and build muscle memory.
Shaping and Forming Perfect Crescents
Making the perfect swiss pastry is more than mixing ingredients. Shaping gipfeli is an art that turns dough into a beautiful crescent. Learning this skill will make your swiss pastry look like it was made by a pro.
Classic Crescent Formation
To make the classic gipfeli shape, follow these steps:
- Stretch your dough into a wide rectangle about ¼-inch thick
- Cut the dough into long triangles, about 4 inches wide at the base
- Start rolling from the wide end toward the pointed tip
- Gently curve the ends to form the crescent shape
Tips for Even Sizing
For consistent swiss pastry, use these tips:
- Measure triangles before cutting
- Use a sharp pizza cutter or pastry wheel
- Keep triangle sizes even
- Keep dough at a consistent temperature
Common Shaping Mistakes
Avoid these common mistakes when shaping:
- Don’t overstretch the dough to avoid tears
- Roll gently to keep layers flaky
- Apply even pressure while shaping
- Make sure to seal the pointed end
Pro tip: Chill your dough between folding and shaping to maintain structural integrity and achieve flakier layers.
Baking Temperature and Timing Guide
To get the perfect golden-brown Gipfeli, you need to be precise. The secret to making delicious breakfast pastries is knowing your oven’s temperature and how long to bake them.
First, preheat your oven to exactly 375°F (190°C). This temperature is key for a crisp outside and a soft, flaky inside. Experienced bakers know that keeping the temperature right is essential for those flaky layers.
- Baking Time: 15-20 minutes
- Ideal Color: Rich golden brown
- Texture Goal: Crisp exterior, soft interior
Keep an eye on your pastries in the last few minutes of baking. They quickly go from not done to perfectly golden. Look for a uniform golden color to know they’re done. If they’re too dry or pale, they’re overbaked.
Pro tip: Every oven is slightly different. Use the first batch as a learning experience to calibrate your perfect baking technique.
Small changes in temperature can make a big difference. Baking them too low means they won’t be golden. Too high, and you might burn the layers that make these treats special.
A kitchen thermometer is your best ally for making perfect breakfast pastries every time.
Sweet and Savory Filling Options
Exploring Swiss cuisine and viennoiserie opens up a world of Gipfeli fillings. Your homemade pastry can become a breakfast treat or a culinary adventure with the right ingredients.
The magic of Gipfeli is in its versatility. Whether you want something sweet or savory, these pastries offer endless possibilities for creativity.
Traditional Swiss Fillings
Swiss bakers have mastered the art of filling Gipfeli with classic ingredients. These ingredients reflect their culinary heritage:
- Apricot jam – a quintessential swiss cuisine favorite
- Chocolate chunks – melting with rich, decadent flavor
- Almond paste – providing a nutty, textured experience
Modern Flavor Combinations
Viennoiserie enthusiasts can try unique and unexpected fillings:
- Goat cheese and herb blend
- Nutella and hazelnut spread
- Cream cheese with smoked salmon
Seasonal Variations
Adapt your Gipfeli to match the season’s bounty:
| Season | Recommended Filling |
|---|---|
| Spring | Asparagus and fresh ricotta |
| Summer | Fresh berry compote |
| Autumn | Pumpkin spice cream |
| Winter | Spiced apple and cinnamon |
Pro tip: Always let your Gipfeli cool slightly before adding delicate fillings to prevent sogginess.
Storage and Reheating Methods
Keeping your homemade buttery pastries fresh is key. They need careful storage and reheating to stay delicious. Your freshly baked Gipfeli should get extra care to keep their amazing flavor and flaky layers.
For short-term storage, follow these easy steps:
- Keep pastries at room temperature
- Use an airtight container
- Consume within 1-2 days for optimal taste
Freezing is great for longer storage. Proper freezing techniques let you enjoy your pastries weeks later:
- Wrap each swiss croissant individually in plastic wrap
- Place wrapped pastries in a freezer-safe zip-lock bag
- Store in the freezer for up to one month
Reheating your swiss croissants is easy. Just preheat your oven to 350°F (175°C) and warm the pastries for 5-10 minutes. This method brings back their fresh-baked quality, with a crisp outside and soft inside.
Pro tip: Don’t microwave your pastries. It can make them soggy and ruin their delicate texture. The oven is the best way to revive your homemade Gipfeli.
Troubleshooting Common Issues
Mastering the art of traditional Swiss baking with a gipfeli recipe can be challenging. Even seasoned bakers face obstacles when making these delicate pastries. Fortunately, most problems have straightforward fixes that can greatly improve your baking.
Density and Rise Problems
Dense or heavy gipfeli often come from a few main causes:
- Yeast quality: Always use fresh, active yeast
- Proofing environment: Ensure a warm, draft-free space
- Ingredient temperatures: Keep butter and dough at optimal temperatures
Lamination Difficulties
The key to flaky layers in your gipfeli recipe is proper lamination. Look out for these common issues:
- Butter melting during folding
- Inconsistent dough thickness
- Uneven butter distribution
Cold butter is essential for creating those light, airy layers in traditional Swiss baking. If your butter gets too warm, chill the dough for 15-20 minutes before you continue laminating.
Baking Challenges
Uneven browning or soggy bottoms can ruin your gipfeli recipe. Here are some tips:
- Preheat your oven thoroughly
- Use a light-colored baking sheet
- Position the rack in the middle of the oven
Remember, practice makes perfect in traditional Swiss baking! Every batch of gipfeli you make will help you get better at this delicate pastry.
Conclusion
You’ve now learned how to make authentic Swiss pastry at home. By mastering the Gipfeli technique, you’ve started a journey through Swiss cuisine. This journey turns simple ingredients into amazing flaky crescents.
Each step, from folding to baking, brings you closer to being a pro. Your family and friends will be impressed by your baking skills.
The seven key secrets will guide you to success. These include perfect dough, expert lamination, and precise proofing. You’ll also learn about careful shaping, ideal baking temperatures, and avoiding mistakes.
Swiss pastry making is an art that needs patience and practice. Don’t be afraid to try new fillings and techniques. This makes your recipe truly unique.
Your baking adventure doesn’t stop here. Every Gipfeli you make connects you to a long tradition. Enjoy these pastries for breakfast, as a snack, or at special gatherings. You’ve become part of a delicious Swiss baking legacy.
Keep exploring and baking. Most importantly, enjoy the process of creating something special. Remember, great baking is about passion, precision, and personal touch. Your Gipfeli journey is just starting, and the Swiss cuisine world is waiting for you.